


Diasen Diathonite Thermactive .037


Product calculator
mm thickness
Product Overview
Main purpose
Insulating the building and maintaining the breathability of the wall or ceiling. Protects from cold in winter and overheating in summer. Also used as an insulated levelling coat for Retro EcoWall prior to using Gutex Thermoroom or Calsitherm insulation boards.
Use it on
Internal solid stone or masonry walls and ceilings. Can also be applied to wood-based panels/sheathing, laths and plasterboard that have been primed with Diasen Aquabond Primer.
Overview
Diathonite Thermactive .037 is a lime-based insulating plaster made from Hydrated lime, NHL 5 binder, Expanded Amorphous Silicium, Pumice, Perlite, Cork and Diatomaceous earth. Used internally on solid masonry walls and ceilings, it is highly breathable and helps walls in older buildings dry out thanks to its capillary active nature. Diathonite Thermactive is compatible with a range of substrates, but is mostly applied to solid stone or brick (once any gypsum plaster has been removed) and provides significant thermal improvement to these walls.
Features
- The best thermal conductivity available in a plaster
- Beautiful finish
- Award-Winning
- Breathable and Capillary active
- Easy Application
- High Elasticity
- Easy thermal bridge solution
- Excellent drying times
- Fire Protection (A1 non-combustible)
- Antibacterial Properties
Benefits
- 50mm of Thermactive improves the thermal performance of a wall by approximately 4 times keeping walls warm in the winter and cool in summer.
- Creates a sympathetic restoration and insulation which maintains the unique characteristic of existing walls allowing them to breathe and balance room humidity.
- Winner of the Renewable Product Category at the RIAI Architects Choice Awards – 2018.
- Dual function plaster can be used as insulation and a levelling coat on the wall.
- Natural cork and lime offer breathability and thermal insulation to prevent condensation and mould.
- Up to 10 times more elastic than traditional plasters reducing the risk of cracks.
- Provides a simple and easy solution to thermal bridges.
- Can be sprayed-on or applied by hand; experienced lime plasterers or DIY enthusiasts can install it without special training.
- Dries much faster than traditional lime.
- Euroclass A1 fire resistance, does not burn or smoke so improves fire safety of buildings.
- Complies with Building Regulations.
Questions
Can this insulating plaster be finished with gypsum?
Do you need to pre-prime bare brickwork or blockwork prior to applying the Diathonite range of plasters?
Are hydrophobic creams breathable? Do they prevent moisture from escaping from inside to outside?
“Diathonite plasters are the best performing thermal plasters, but are very expensive!”
Technical Details
Key Technical Data
Installation Guide
Find an installerBefore You Start
Before installing any internal wall insulation, it is essential to investigate and fix any existing damp or moisture related issues in the wall. Even though our internal wall systems are breathable and provide optimal protection against condensation, persistent damp issues must be resolved first. A wet wall is a cold wall, so preparation to remove or reduce external sources of moisture is key to achieving optimum results.
Once damp issues have been resolved, the wall should be allowed to dry thoroughly and re-assessed for suitability of internal wall insulation.
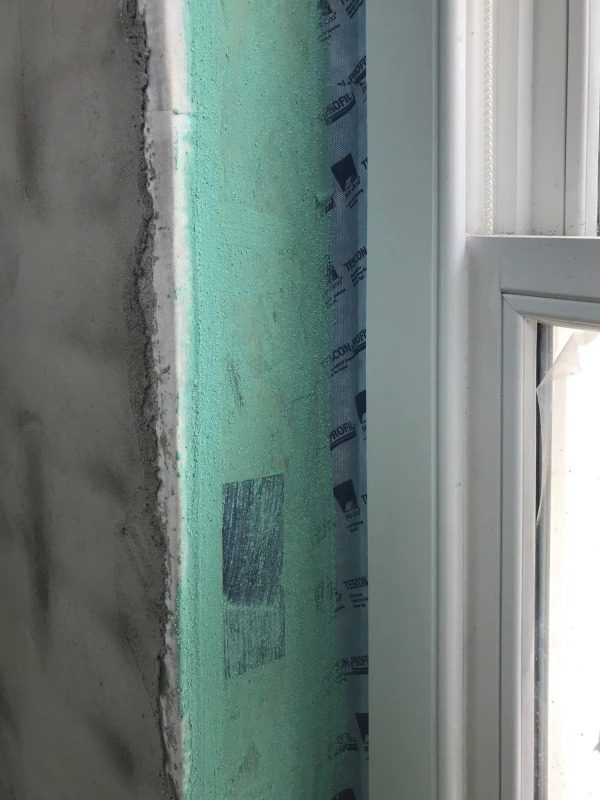
Any existing gypsum plaster on the internal side of the wall should be removed first to reveal the stone or masonry underneath. This ensures the wall will be fully breathable and allows the Diathonite to work to its full potential. It also provides a reliable key for maximum adhesion of the Diathonite to the wall.
These are the main considerations before commencing any work:
- Is there evidence of moisture in the walls?
- Is there any evidence of condensation, fungus or mould growth on the internal walls?
- Is there a functioning damp proof course (DPC)?
- Is there sufficient ventilation in the property?
- Is the external ground level higher than the floor level inside?
- Are there any structural defects in the external walls?
- Is guttering, flashings and external pipework in good condition?
- Is the external render, pointing or cladding in good condition and providing adequate weather protection?
- Is the external finish suitable for the severity of wind driven rain exposure?
- Are the timber joists embedded in external walls free from infestation and rot?
- Has the building ever been flooded?
- If you chose not to remove existing plaster on the wall, is this plaster fully compatible with the insulation system being used? (Ideally, it would need to be lime-based, any existing gypsum plaster on the internal side of the wall should be removed first)
How to Install
Application Thicknesses
The minimum application thickness of Diathonite plaster is 15mm. It should be built up in 15-25mm layers to the required total thickness, generally one layer of Diathonite per day. A typical thickness of 40-60mm improves the thermal performance of the wall by 3.5-4.5 times.
For thicknesses of 60mm or more, Diasen Polites 140 reinforcing mesh must always be used. This should be applied when half the total thickness of Diathonite has been applied (and it is still wet). So, for 70mm total thickness, you must apply 35mm of Diathonite, then Polites Mesh, then the remaining 35mm.
For application on a ceiling, the maximum thickness is 30mm. This should be applied in two 15mm layers with reinforcing mesh in between. Reinforcing mesh must always be used when applying Diathonite to a ceiling.
Drying Times
When applying multiple layers of Diathonite, each layer of plaster should be left for 24-48 hours before applying the next layer. 24-48 hours is typical, but if you leave more than 24-48 hours between layers, the Diathonite may dry out a bit too much. If the previous layer is too dry, Diathonite applied on top may peel away or "bounce off" the wall when applied. In this case a "spatter" coat can be applied to create a good key for your next layer. Wait a few hours after applying the spatter coat, then apply your next layer as normal.
A spatter coat is very small amounts of Diathonite (in tiny lumps) thrown or sprayed onto the wall to create a patchy texture of lumps on the surface. The spattered Diathonite is too thin and lightweight to fall off and after a few hours will provide an excellent key for the next normal layer to be applied over the top.
If the next layer is applied too soon, you may find the Diathonite slides off or slumps towards the floor. In that situation, simply wait a few hours and try again.
Once you have applied the final layer of Diathonite, it must be allowed to dry thoroughly before applying Diasen Argatherm finishing plaster. At 20°C and 40% relative humidity, we estimate Diathonite will dry at a rate of approximately 2mm per day. So, 40mm of Diathonite, will usually dry in around 20 days. As the drying time does vary based on environmental conditions each day, it is best to look at the surface; if it looks light grey all over, with no darker areas, it is ready for the finishing plaster.
As Diathonite is capillary active, applying the finishing plaster before the Diathonite has dried sufficiently can increase the risk of moisture, minerals, and tannins (from the cork) being drawn into the final finish. To avoid this and reduce the risk of stains forming on the finished surface, do not apply your finishing plaster too soon! If you do apply it too soon, staining should disappear after a few months once the Diathonite has fully dried and moisture levels in the wall return to normal.
Like all plasters, care should be taken when plastering during heat waves or when temperatures approach 5°C or when the plaster is directly exposed to prevailing winds. Please be aware, if the temperature is lower than 20°C or relative humidity is higher than 40%, drying time and the time between layers will be longer. In higher temperatures or lower humidity or if the Diathonite is exposed to persistent winds or direct sunlight, the drying times will be less. If you experience or expect to experience extremes of temperature, weather, or humidity during and after installation, always consult our technical team for advice before commencing work.

When used internally, Diathonite Thermactive .037 should be finished with a layer of Argatherm, a breathable lime-based finishing plaster. The wall should then be painted with Diasen D20+ breathable primer before finishing with a breathable paint like Auro. If the wall is only being insulated internally and the exterior is not rendered, we would recommend a breathable rain repellent like BKK ECO be applied on the outside to limit the amount of moisture absorbed by the wall externally.
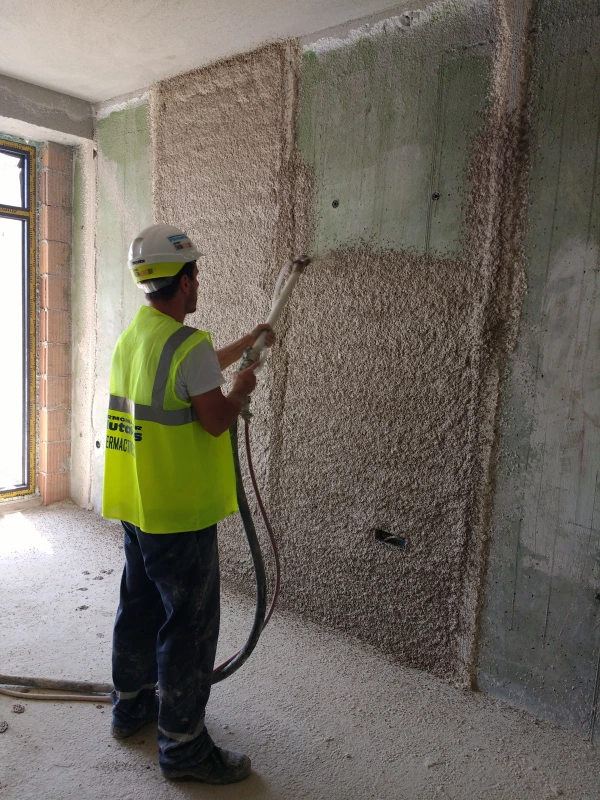
For projects of 100 square meters or more, Diathonite Thermactive .037 can be spray applied using a spray pump machine. An experienced trained installer is recommended for larger projects and spray application. Spraying is quicker than hand applying and uses approximately 10-15% less material because the plaster is not being compacted by a trowel.
Hints and Tips
All coverage/yield figures quoted are based on application to a smooth level surface. They are for guidance only and do not include material required to level (dub out) the walls.
Fixing items to Diathonite plasters
Diathonite thermal plasters are non-structural mortars. This means to fix items to walls, they must be fixed through the Diathonite directly into the masonry.
Similar to most plasters, Diasen thermal plasters should not be relied upon as a means of fixing heavy items such as shelving, cabinets, sanitaryware etc. Lightweight items such as sockets, light switches etc. can be fixed using suitable wall plugs or dowels.
Example fixings for support of lightweight items secured into insulation (rather than masonry) can be seen in this PDF on pages 16-18. Always follow the fixing supplier's guidance precisely if the fixings described in this PDF are used.
Tiles may be applied to Diathonite thermal plasters following the tile adhesive's application instructions. A thickness of 30mm of Diathonite can support, up to 50kg of tiles per m². This is only possible if the bottom row of tiles rests on the floor in order to bear some of the weight.
Problematic walls
On walls with white salt deposits (efflorescence) or high moisture content, Diathonite Deumix+ can be used to speed up drying and act as a salt inhibiter. Diasen Regularisation could also be used as the first layer of plaster (underneath the Diathonite Evolution) on walls with severe salt issues when required.